Do This When Shooting Indoor Photography

Shooting indoors can be tricky!

Let me share tips on how to execute it properly, shooting with a DSLR or iPhone/android.

1. Turn off overhead lighting. This helps your photos white balance be more neutral. If the lights were on, your photo would turn out yellow.

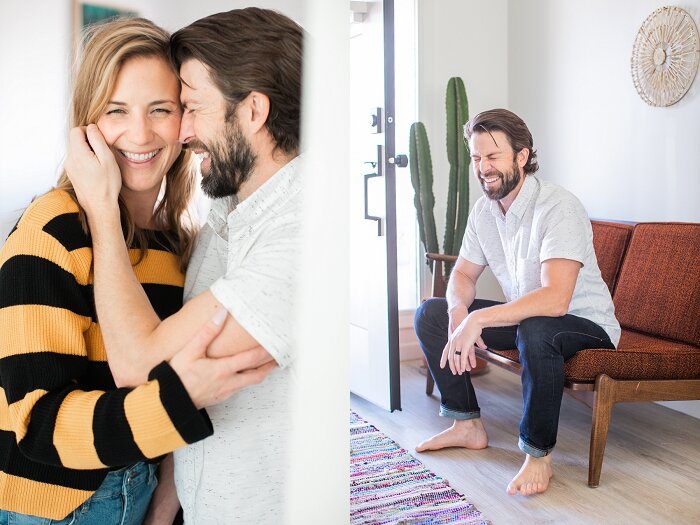
2. Move near a window or open door and have your subject face the light. This helps to illuminate your subject nicely.

This seems like an obvious thought, but you’d be surprised to know this is the biggest mistake people make when it comes to properly lighting your scene.

3. Purchase white foamboard at any grocery store. The foamboard can be used as a reflector or fill light. Simply place the board near your subject, with the light bouncing on the board, then onto your subject. The foamboard will also help neutralize your white balance.

There you go! Try it out for yourself and don’t be afraid to move around and try different angles, use different lenses or change your ISO.

Have questions? Comment below and I’d love to talk more with you.

Do This When Shooting Indoor Photography

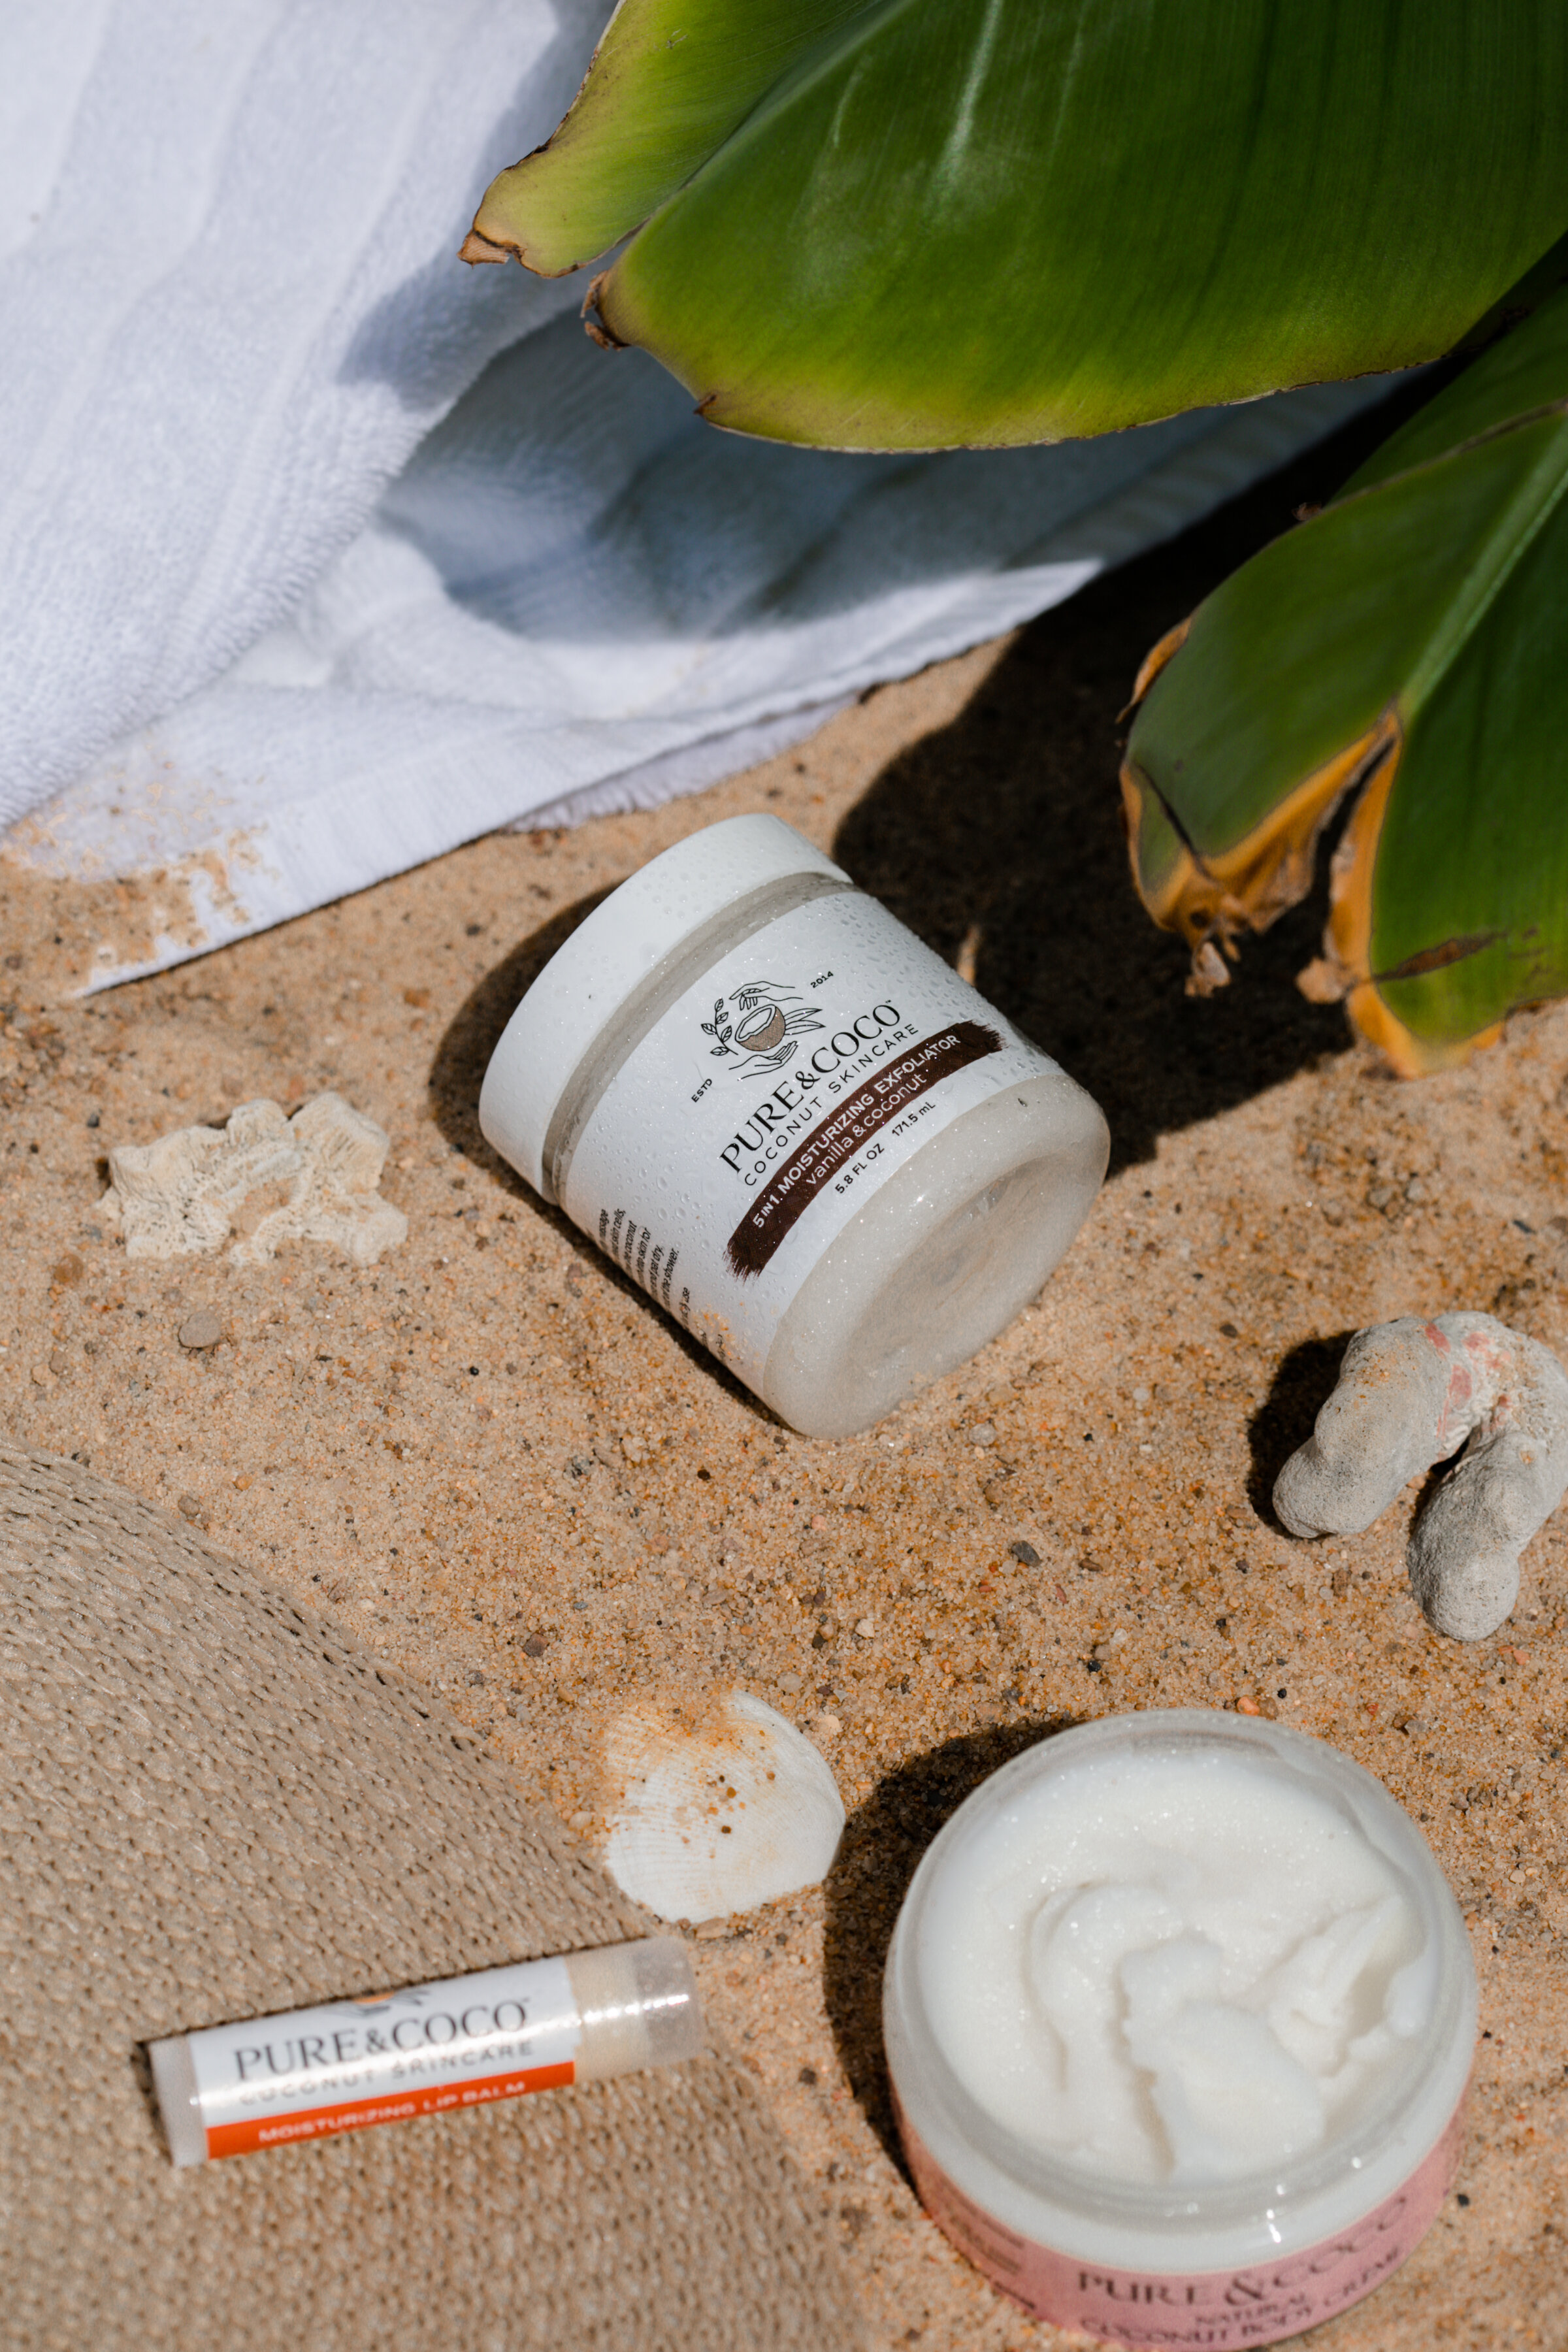
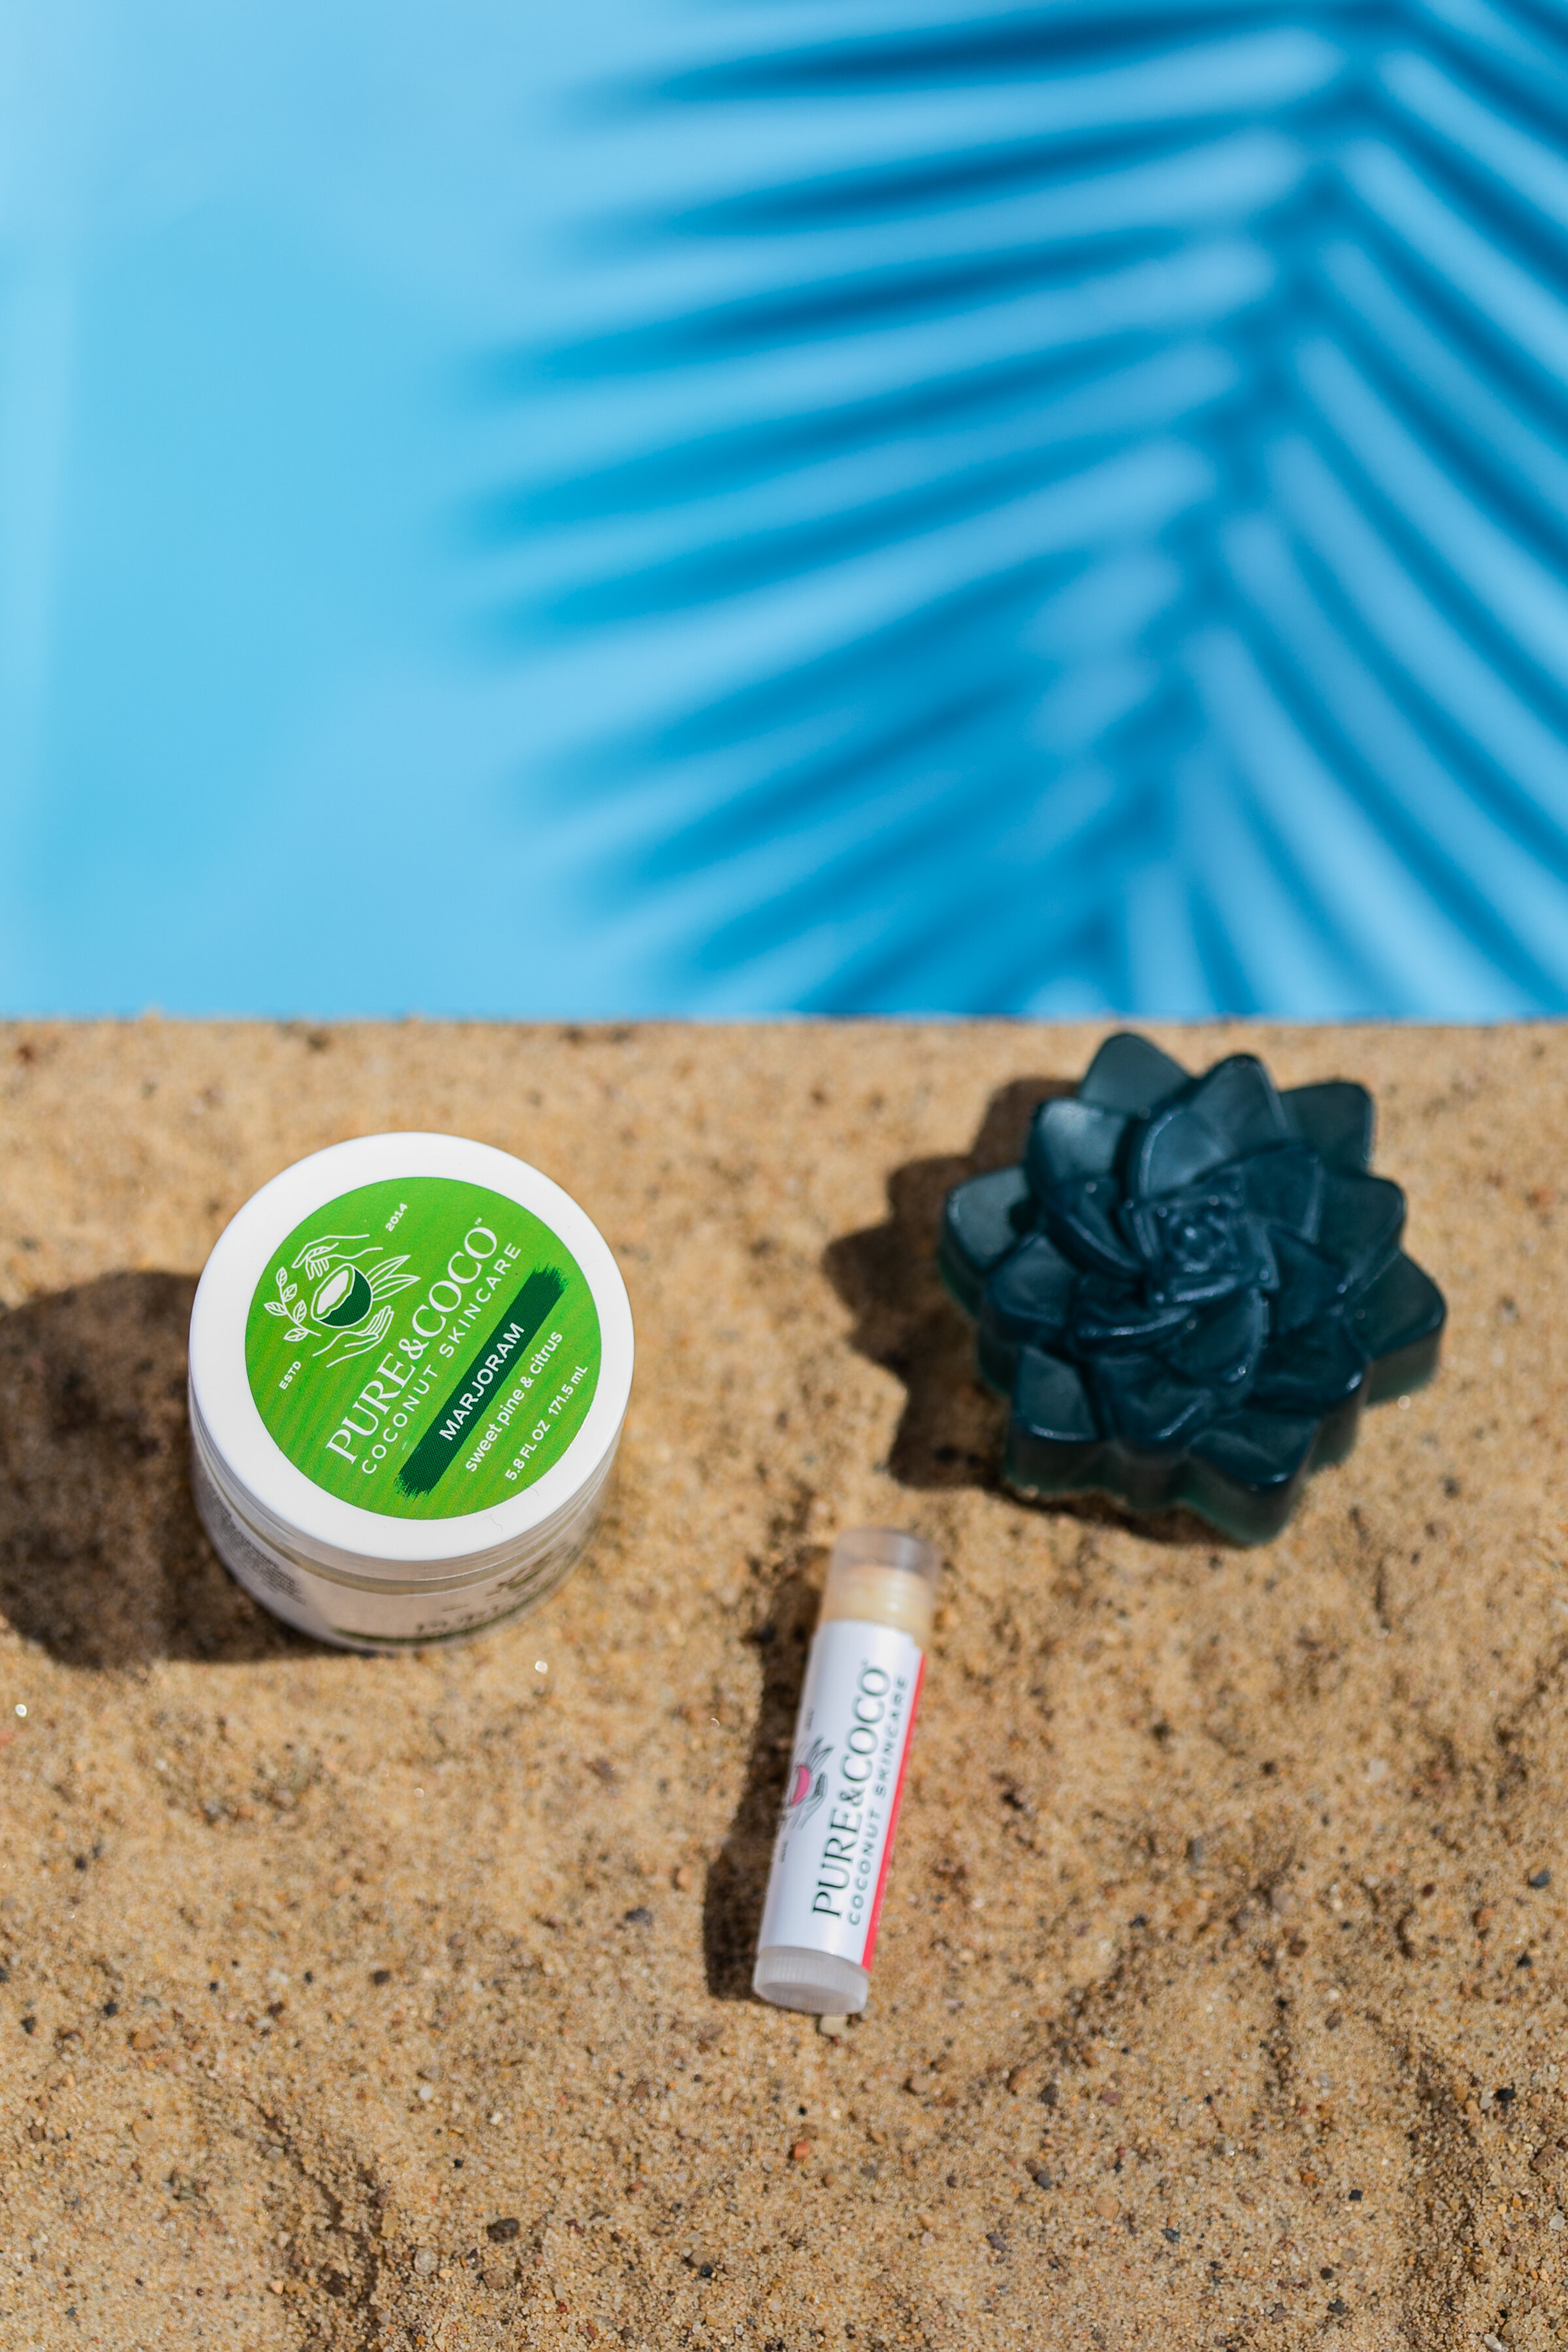
How To Fake A Pool-Beach Look For A Product Shoot

Planning ideas for a product shoot can be extremely fun and hard at the same time.

The goal is to make sure my clients are 100% satisfied in the end. The professional photographs I provide for them are meant to connect their clientele-present and future, with the products they sell in hopes they become long time customers.

Sometimes the ideas might seem impossible. For example, I don’t live near the beach, or own a pool.

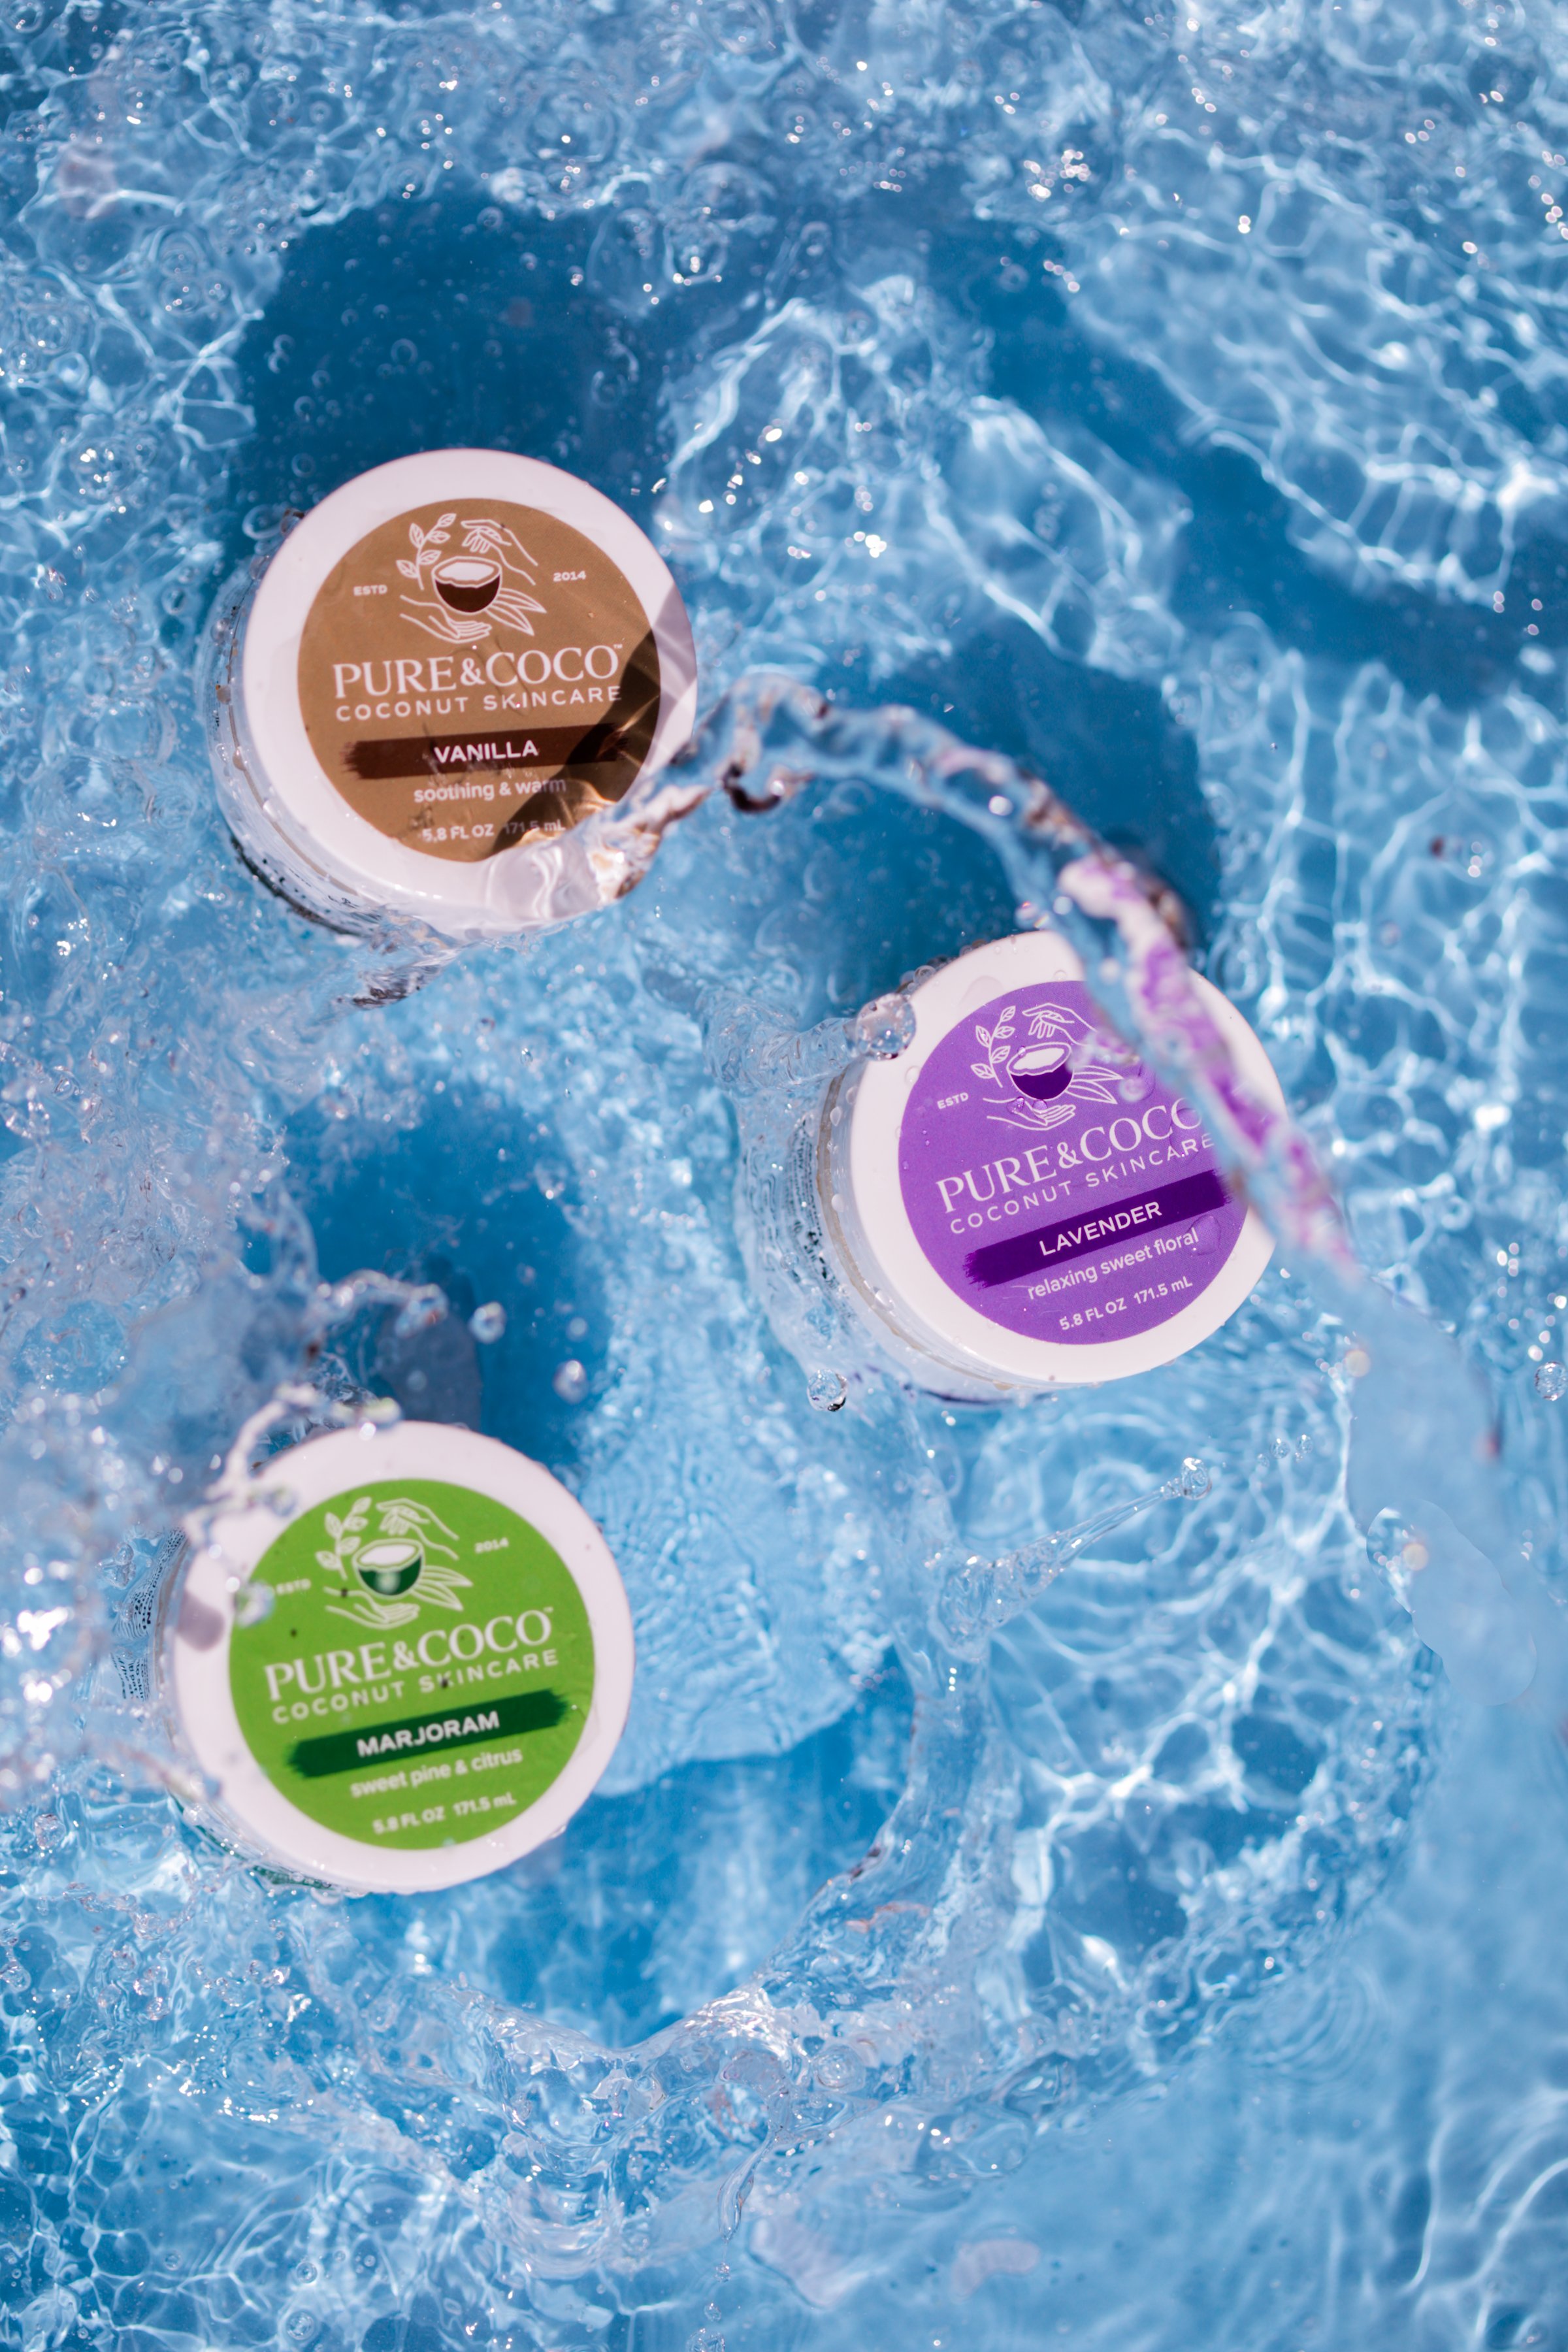
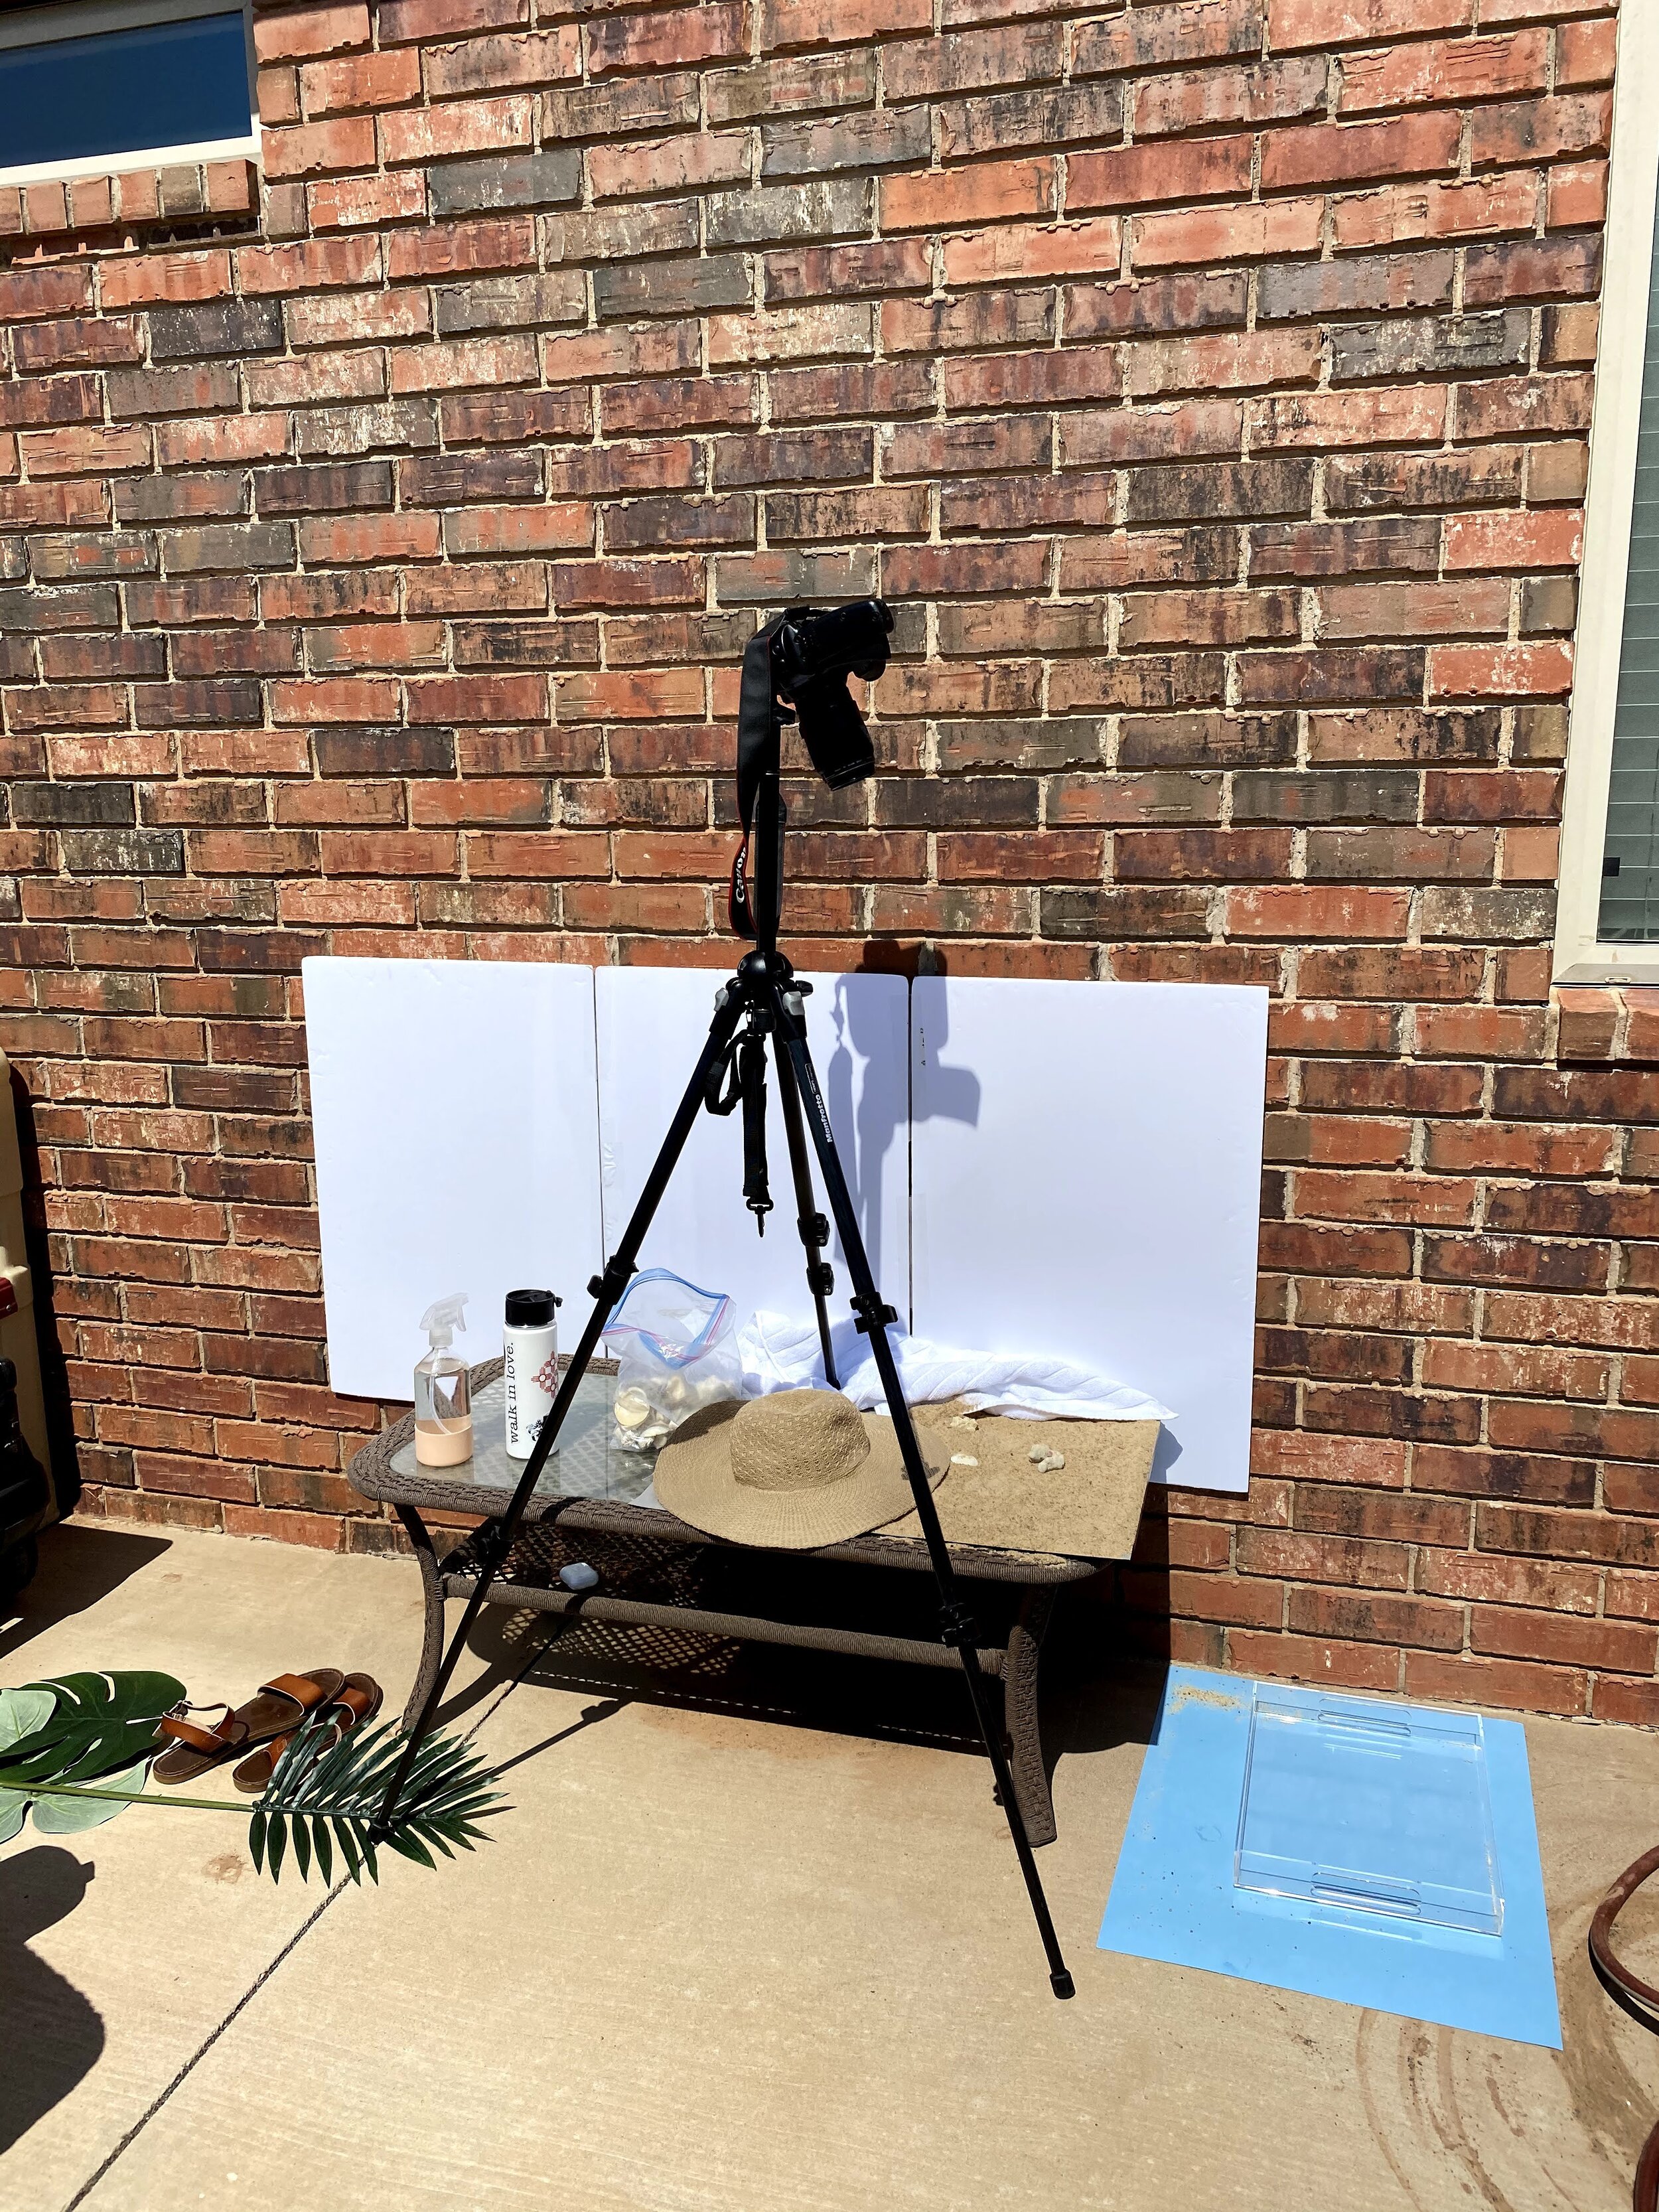
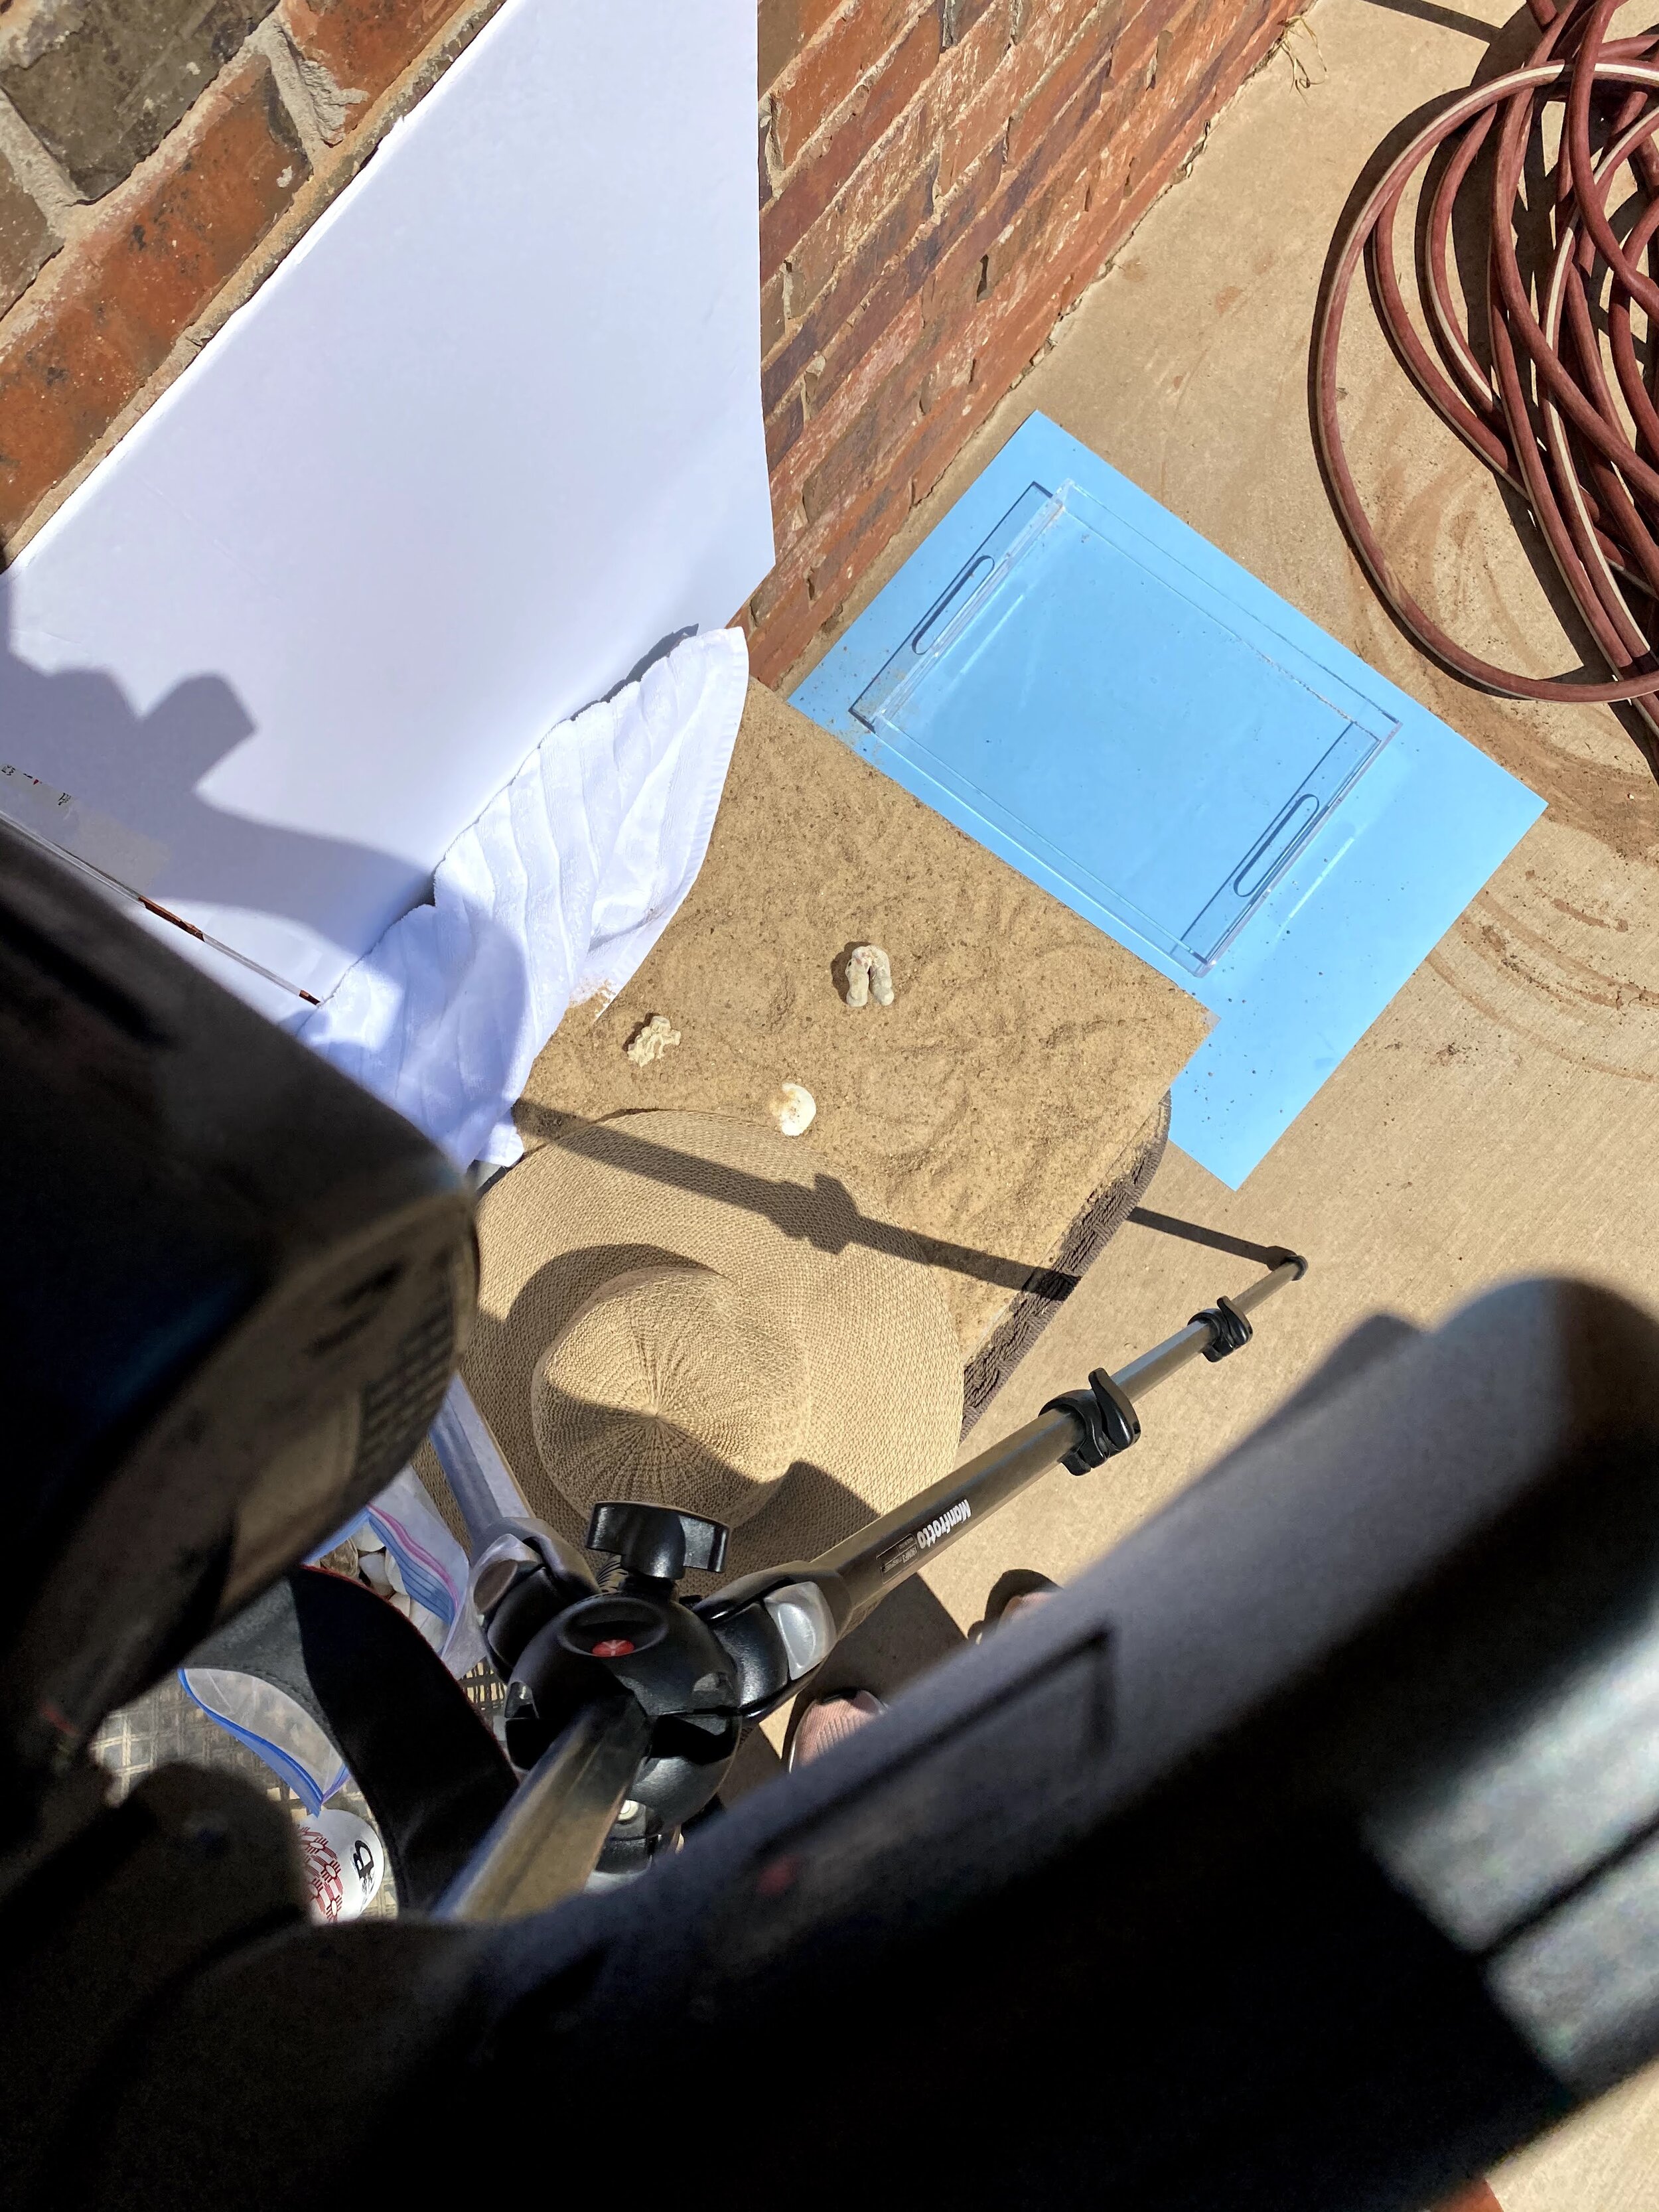
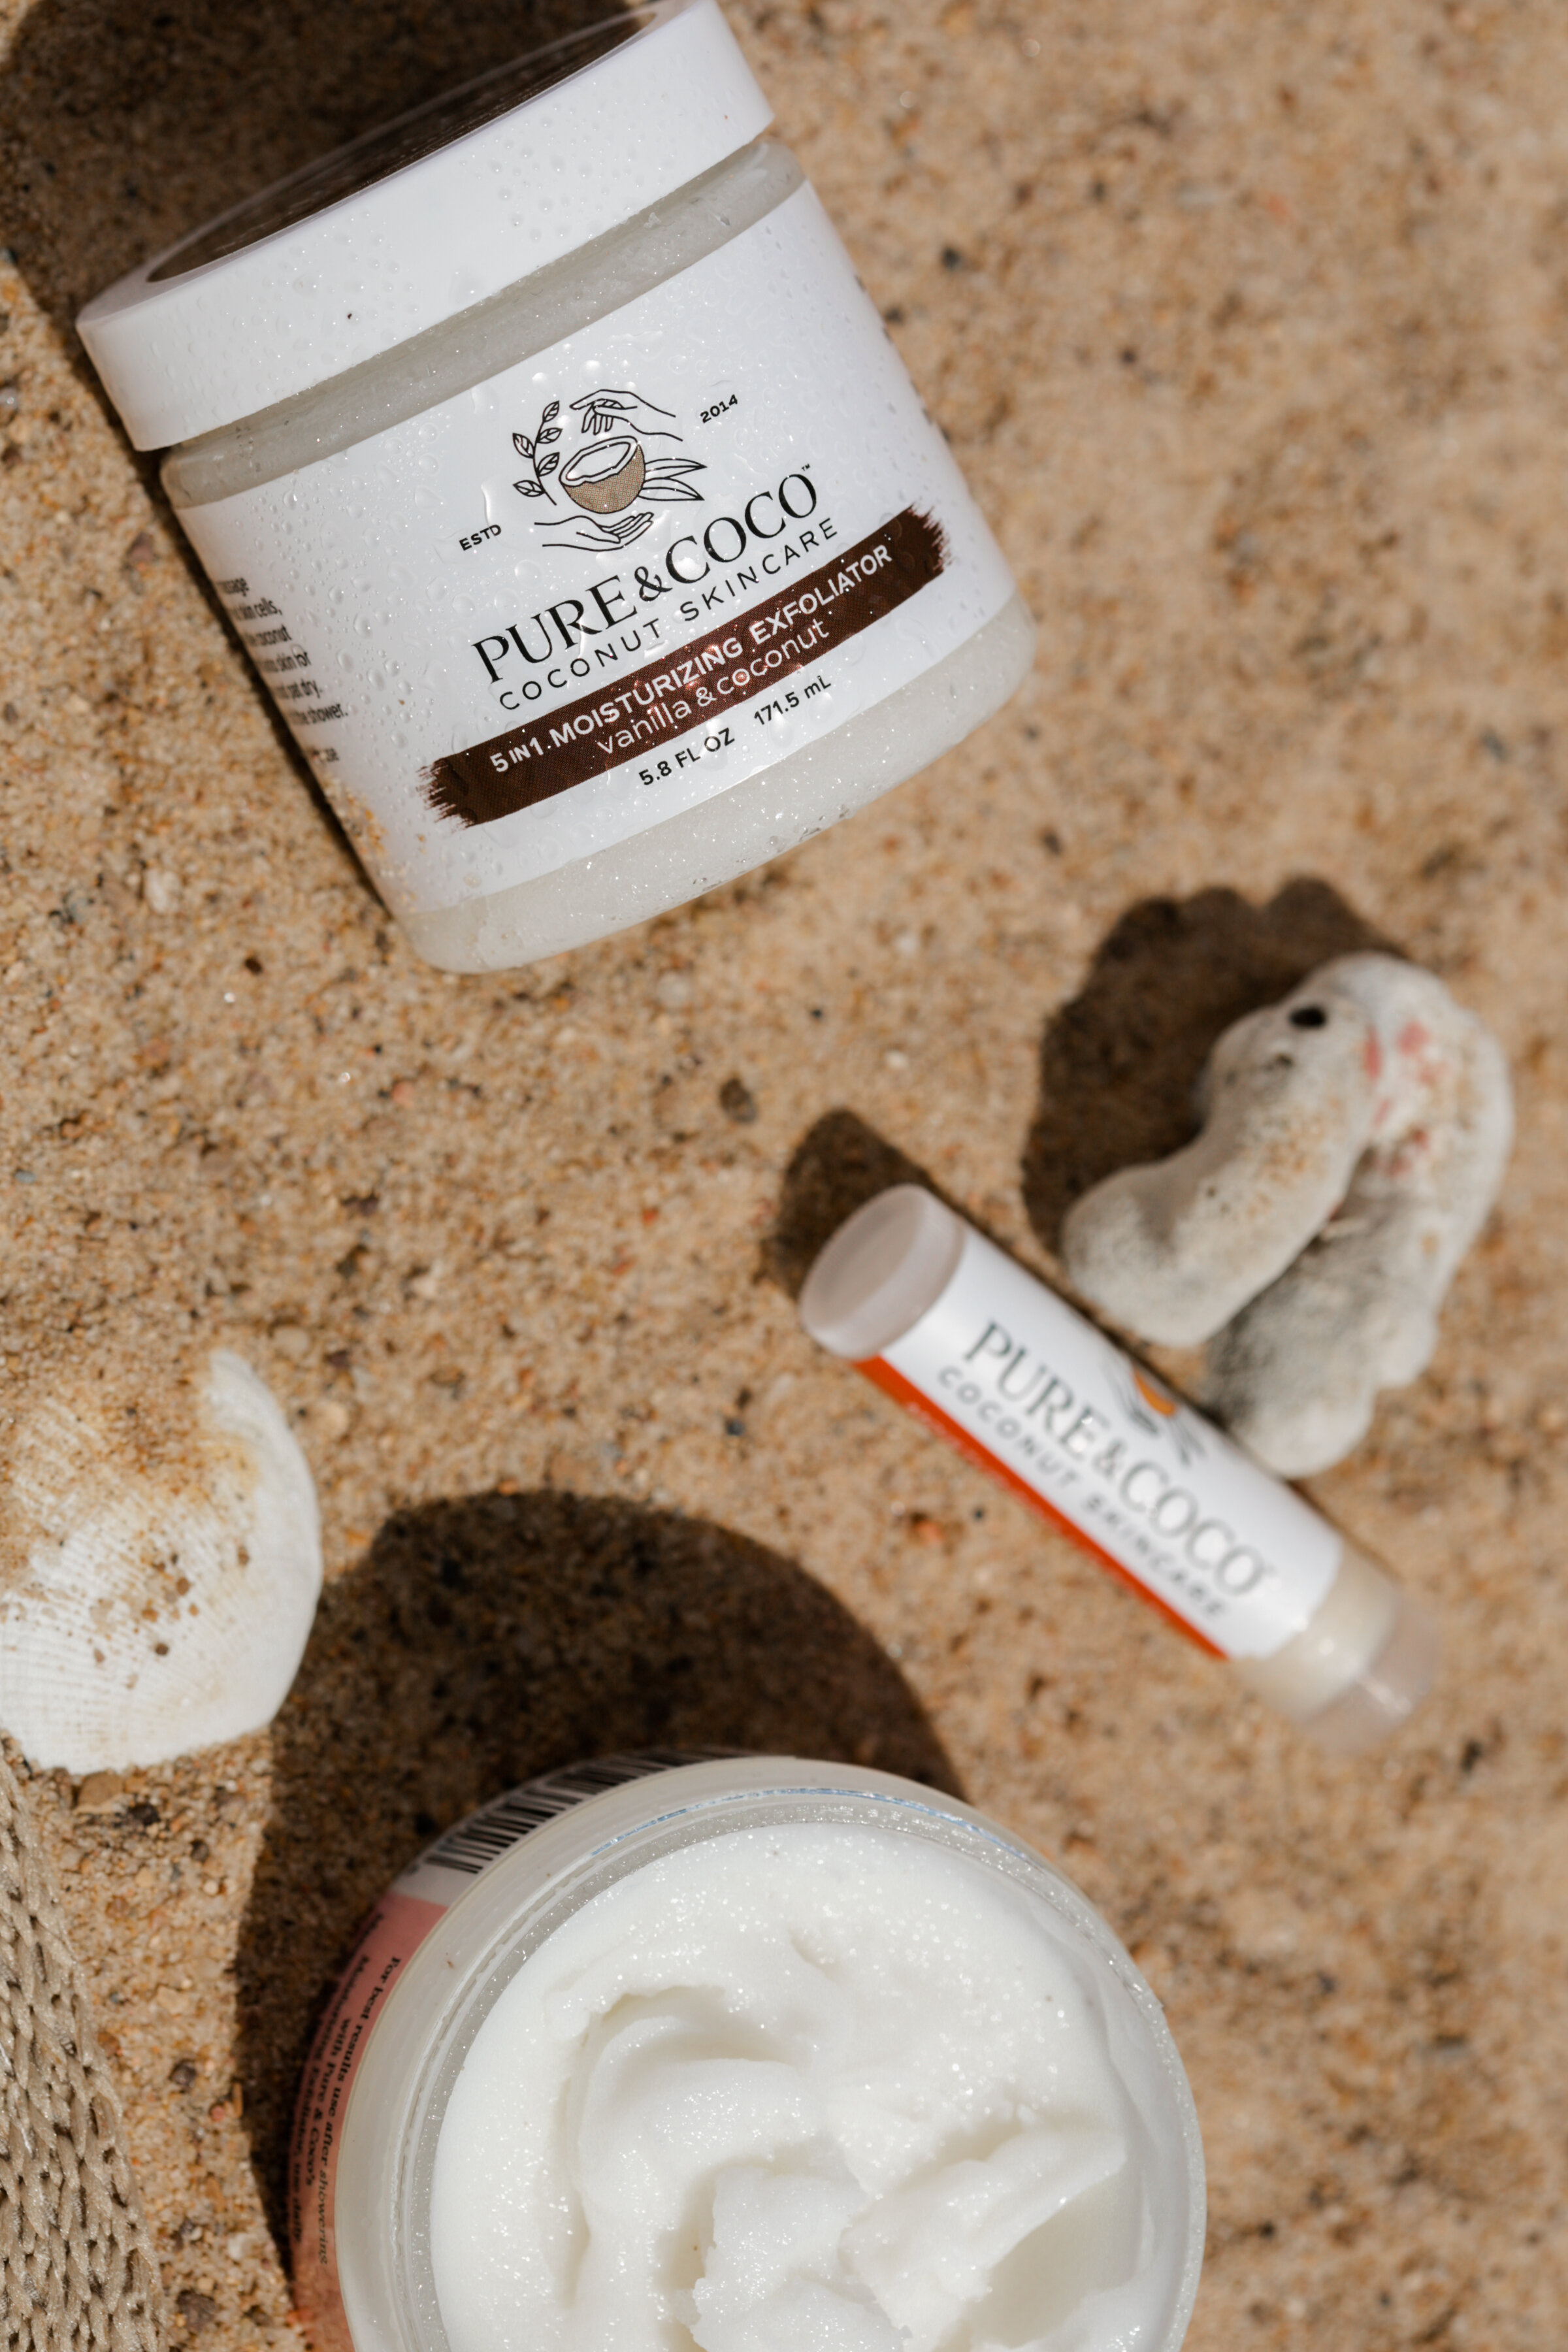
For one of my styled shoots, I wanted the setting to be at the beach or pool. So instead of it stopping my creative process, I made a beach/pool scene and I chose to shoot this outside to give it the high contrast light.

The tools used:

  • Playsand

  • Clear acrylic container

  • blue poster board

  • water hose

  • beach props

  • clients products

  • white foamboard to reflect light on your subject and cancel out the warm tones from the brick.

  • tripod

  • Spray bottle with water to make the sand wet and condensation on products

Tips:

  • As you are shooting, be aware of your own shadow

  • Try several angles

  • Move props around to try different looks

  • Under-expose (darken) your photo when shooting outside. It’s hard to see the exposure correctly when shooting outside in the bright light.

  • Shoot with a variety of lenses so you can get different looks

You can shoot these with your DSLR or iPhone. I hope you have fun creating.

If you have questions, leave a comment and I’ll be happy to answer them.

Featured product: Pure and Coco

Behind the Scenes Product Shoot: Pure and Coco

Behind the scenes product shoot

Today I’m highlighting a product shoot I did with Pure and Coco.

They are a product subscription client, and send me their products from Washington.

For 2021, I will have the honor of doing a shoot for them each month.

I’m excited for each shoot, because they will challenge me to be more creative than the shoot before, which will result in inventive photos for my clients.

Are you a product based business and interested to hear more about how a subscription shoot works?

Whatever it is, the way you tell your story online can make all the difference.

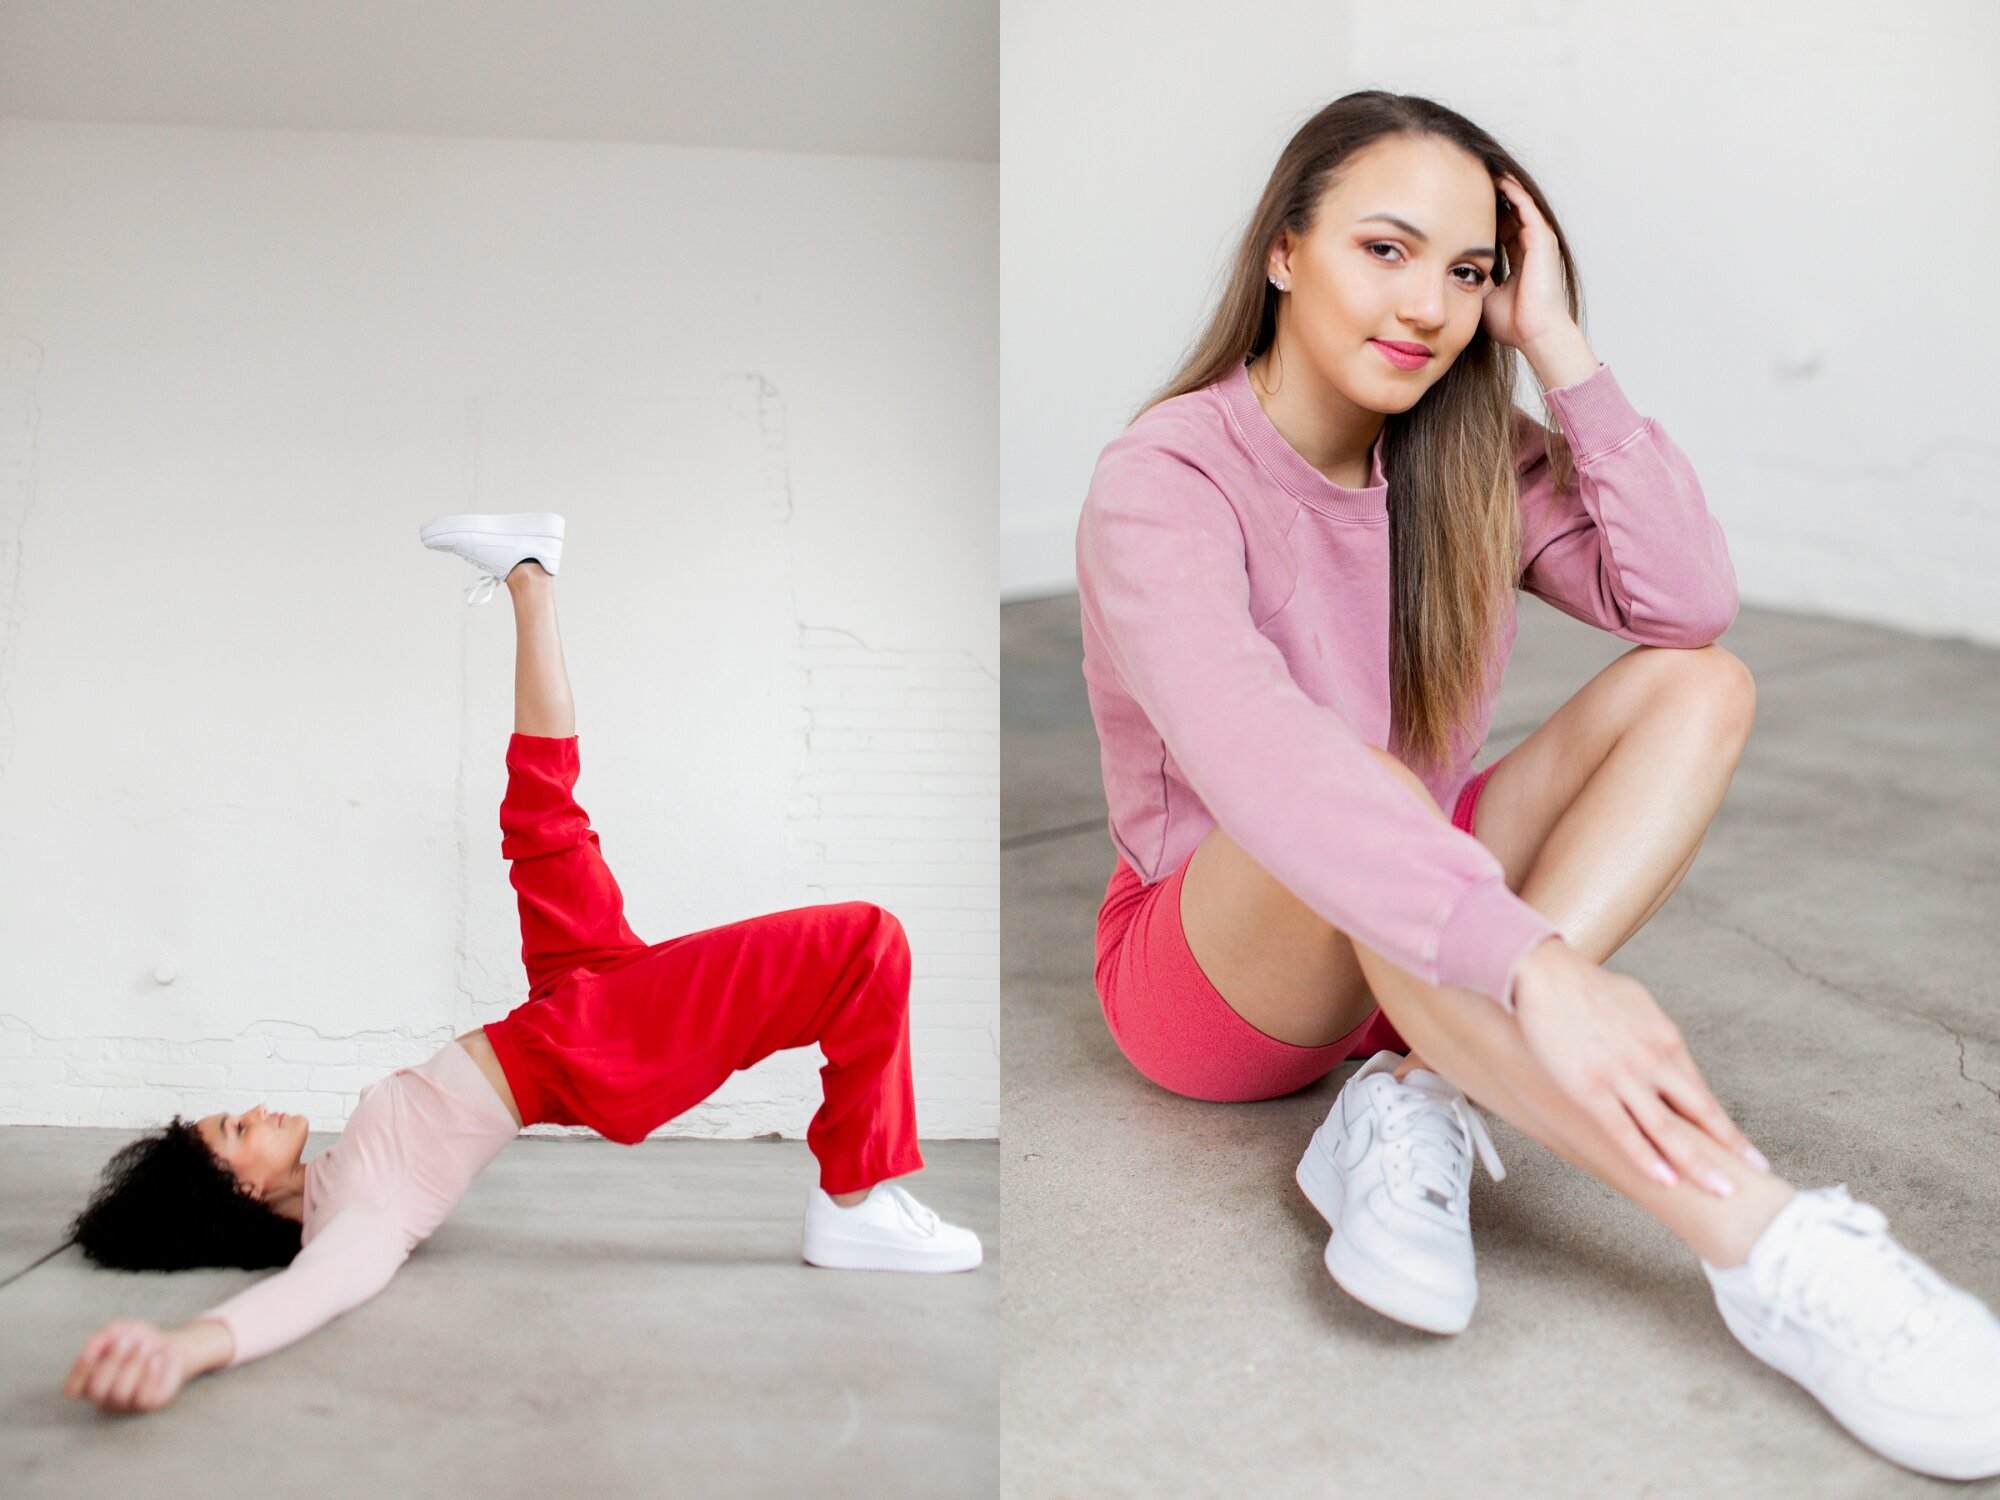
Don’t just stand there! Revive Your Boring Poses

How do you revive your boring pose ideas when photographing portraits?

Add angles with your arms and legs.

When you do this, it creates movement to your photo and brings interest from your viewers.

Look at all of those triangles!

Try these poses out on yourself for a self-portrait or grab a friend and do a photoshoot.

Remember, practice makes perfect. So, don’t be discouraged if it doesn’t work right away.

Tell me, do you think you’ll try it?

Whatever it is, the way you tell your story online can make all the difference.

What is a preset, and what does it do?

What is a preset, and what does it do?
⠀⠀⠀⠀⠀⠀⠀⠀⠀
To some, they are magical and life changing.
⠀⠀⠀⠀⠀⠀⠀⠀⠀
I for one am one of those people.😂
⠀⠀⠀⠀⠀⠀⠀⠀⠀
Every single day I edit photos on my computer or phone, I use presets to enhance my photographs.
⠀⠀⠀⠀⠀⠀⠀⠀⠀
A preset is a recipe of ingredients used to make a good photo look great. It’s ingredients consist of adjustments on exposure, contrast, cool or warm temperatures, green or pink tints, deep shadows, or bright backgrounds, luminance and hues, etc. My favorite presets to use are CC Mobile Presets.
⠀⠀⠀⠀⠀⠀⠀⠀⠀
Each preset works differently. Some are made to brighten a dark photo. While others focus on enhancing colors, increasing contrast and lowering the exposure.
⠀⠀⠀⠀⠀⠀⠀⠀⠀
Depending on how your photo was taken, will depend on which preset will look best for your final edit.
⠀⠀⠀⠀⠀⠀⠀⠀⠀
Adding a preset to a dark photo that was meant to bring back highlights (making highlights darker) would end up making the entire photo darker.
⠀⠀⠀⠀⠀⠀⠀⠀⠀
Or, using a bright preset (raising exposure) to an already bright photo, would make your photograph overexposed (too bright).
⠀⠀⠀⠀⠀⠀⠀⠀⠀
These are just a couple tips on using presets. Stick around and I’ll share more in the future or feel free to check out after/before photos at CC Mobile Presets on Instagram.
⠀⠀⠀⠀⠀⠀⠀⠀⠀
Do you have any questions about presets? Leave your questions in the comments section and I’ll dive deeper into them.

After editing the photo below, I went one step further to change up my creative game by flipping the photo.

Top photo: After, Bottom photo: before

Brand photography by Clovis, NM photographer Cristy Cross_0009.jpg

Left: After, Right: Before

Brand photography by Clovis, NM photographer Cristy Cross_0010.jpg

3 Major Steps To Take In Creating Authentic Family Photographs

How do you create authentic family photos?

At the time of booking:

When you first book a family portrait session, send the family a questionnaire. Ask questions that helps you get to know them a little bit better. Questions like, what each family members favorite candy is, or favorite drink at Sonic. These simple questions give you a small insight to their personality, but also allows topics to talk about when you take their pictures.

Day of the session:

First things first. When the session first starts, make some small talk. Be observant when doing the small talk thing. Watch their mannerisms, smiles, touches, and the candid way they stand with their arms folded and hands in the pockets.

If you are photographing them at their home, this creates a comforting atmosphere. Everyone, kids and husbands included, open up a little more than they would in a public location.

However, if you are doing the session at a park, or your local downtown area, give them an action.

Tell them to group up, then gradually watch how their arms fall on each other. If they don’t, direct them a little bit and make a connection between each other.

How to create multiple poses/photos in one setup:

While everyone is in the group, here is a shot list you can use. Keep in mind to work around your subjects.

  1. wide group shot of everyone smiling (safety shot, not as heartfelt, but safe)

  2. close-up group shot

  3. close-up of each person, without anyone moving. Examples are below. Kids might have their arms intertwined in moms arms, or mom might be running her hand through her children’s hair. Again, if they are currently doing them, coach them and direct them through it and make them do an action. It will look authentic and lead to something beautiful.

  4. Photograph the connections. Not just the faces, but also the arms and hands holding one another.

While you are there to photograph the family, don’t forget to snap some of mom and dad. Take a look at these cuties below.

Have any follow up questions. I’d be happy to help. You can email me at cristy@cristycross.com or leave a comment on this post.

*Pin these photos and add them to your Pinterest boards for inspiration.

The Desert Family Photography Session by Clovis, New Mexico photographer Cristy Cross_0001.jpg
The Desert Family Photography Session by Clovis, New Mexico photographer Cristy Cross_0002.jpg
The Desert Family Photography Session by Clovis, New Mexico photographer Cristy Cross_0003.jpg
The Desert Family Photography Session by Clovis, New Mexico photographer Cristy Cross_0004.jpg
The Desert Family Photography Session by Clovis, New Mexico photographer Cristy Cross_0005.jpg
The Desert Family Photography Session by Clovis, New Mexico photographer Cristy Cross_0006.jpg
The Desert Family Photography Session by Clovis, New Mexico photographer Cristy Cross_0007.jpg
The Desert Family Photography Session by Clovis, New Mexico photographer Cristy Cross_0009.jpg
The Desert Family Photography Session by Clovis, New Mexico photographer Cristy Cross_0010.jpg
The Desert Family Photography Session by Clovis, New Mexico photographer Cristy Cross_0011.jpg
The Desert Family Photography Session by Clovis, New Mexico photographer Cristy Cross_0012.jpg
The Desert Family Photography Session by Clovis, New Mexico photographer Cristy Cross_0013.jpg
The Desert Family Photography Session by Clovis, New Mexico photographer Cristy Cross_0018.jpg
The Desert Family Photography Session by Clovis, New Mexico photographer Cristy Cross_0016.jpg
The Desert Family Photography Session by Clovis, New Mexico photographer Cristy Cross_0019.jpg
Dark Orange Women's Fashion Tips Pinterest Graphic.png

Aperture | Basic Photography

Aperture Edition | basic photography

Some things to think about when learning how to shoot in manual with your digital single lens reflex camera (dslr):

-Keep your shutter no lower than 1/100.  This will help prevent blurry or shakiness in you photo from motion happening either from the photographer slightly moving, or your subject moving fast. Ideally, if your subject is moving fast, your shutter would need to be around 1/200 to insure your subject isn’t blurry as well.

-Play around with your ISO.

-Change your f-stop/aperture.  Get comfortable playing around with your settings.

-Shoot a variety. Walk around your subject and shoot from all directions.

-Photograph subjects near and far, shade, and in the sun. 

-Photograph different types of subjects.  For example, portraits, landscape, and action shot. 

-You can also photograph still life.  For example- a wooden chair, flowers, books, bike, car, makeup, pottery, etc.

**Let me also say, you can photograph inside, but only with a good source of natural light.  For example, bring your subject next to a window and use the window lighting. When you are first learning photography, it is easiest for you to shoot with natural light.

Keep a journal of the lenses you are using, the focal length (18mm, 50mm, 75mm, etc), shutter speed, aperture, iso, sun, shade, etc.

What does aperture affect_ (1).jpg
1.jpg

What ISO Setting Should I Use With My Digital Camera?

ISO? What does that even mean? The best and easiest way I like to describe it is like this…

Remember when you would purchase film at the grocery store? They would have 100 speed, 400 speed, 800 speed, etc. The ISO provides your camera with the amount of light you need on your camera’s image sensor for digital cameras and film for, well film cameras.

If it’s sunny outside, you don’t need extra help with light. The light source you are using is already provided…the SUN! But as the day goes on, it can get cloudy or evening time comes around and you lose that light. So what do you need to do to give your camera more light? Answer-Increase your light source by increasing your ISO.

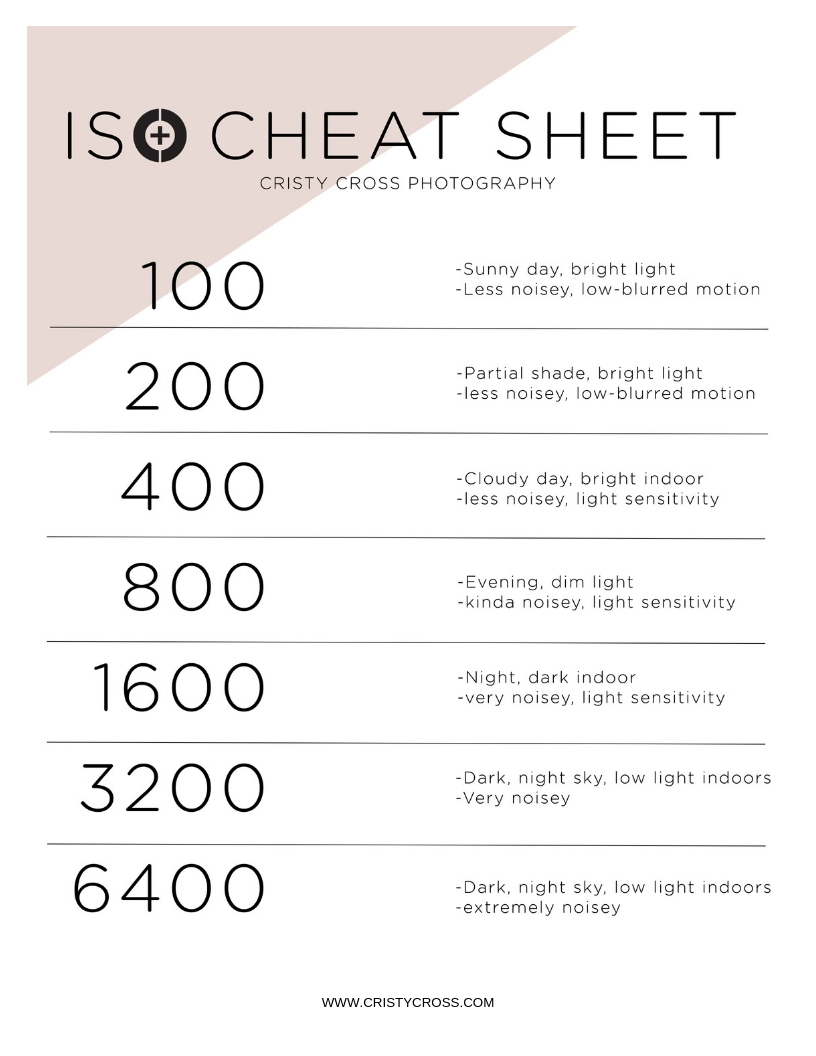
I know it can be confusing, so I made this ISO CHEAT SHEET for you. When I first learned about my camera, it took me a while to put all the steps together. I’m hoping this form will help it all make more sense.

For example, if it’s sunny outside around 10 am, you would set your ISO to 100. Then, in the same day, as the sun goes down, say around 6 pm, you would raise your ISO to 400-800.

Let me also remind you, the ISO, shutter speed, and aperture (f-stop) all work together to make an even exposed photograph. If you’d like to learn more about how to shoot with your digital camera, I’d love to teach you at my DSLR Workshop!

Right now I’m offering a special on group workshops until April 30, 2019. Grab your friends and we will make a fun day out of it!

ISO cheat sheet.jpg

Need ideas on what to photograph? Take a look below to get you started.

what will you photograph_.jpg